Salesforce is a fantastic CRM for managing Shopify leads and turning them into happy customers. It makes the customer journey easier and smoother. However, processing the countless emails coming from your Shopify store can become a major hurdle if you enter Shopify email data manually into Salesforce. The productivity and profitability enabled by Salesforce will both come to a halt. The good news is that it is possible to manage and add new Shopify leads to Salesforce without going through the hassle of manual data entry.
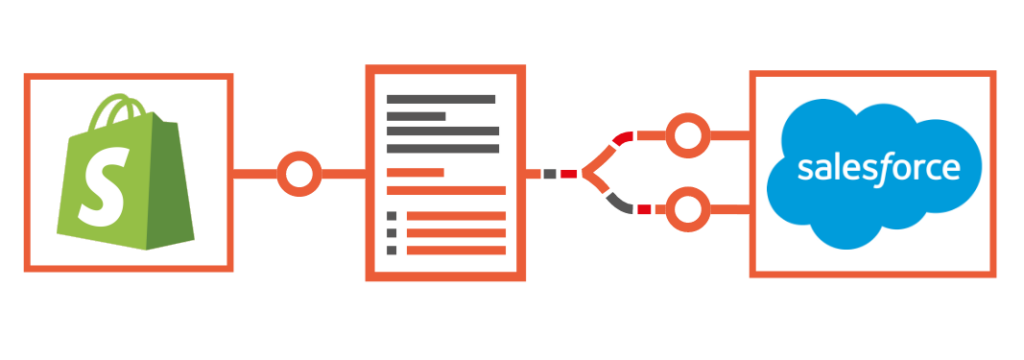
So in this article, we will see how you can extract and move Shopify lead data to Salesforce using Mailparser, the email parser that automates data entry and boosts productivity.
Adding Shopify Leads Manually Costs You Business Opportunities
Capturing lead data is a crucial part of running a successful Shopify store. You can do that in various ways, from creating content to offering free deals. But things are far from over when new leads or customers come in. You need to convert leads and maintain engagement after the first purchase.
Let’s say a person lands on your homepage and enters their email address in a popup for a discount code. Or a person adds items to their cart only to abandon it later. When events like these occur on your Shopify site, you will receive notifications by email. Shopify store owners typically receive a lot of emails triggered by different events:
- New orders
- New email subscribers
- Abandoned carts
- Canceled orders
- Contact form submissions
All of these events are opportunities to convert leads into customers. If you use Salesforce, you know how effective it is for tasks such as:
- Recover lost sales
- Provide customer support
- Offer promotions and deals
- Send in-stock notifications
- Analyze the customer base to find growth opportunities
- Run highly-targeted email campaigns
- Etc.
However, performing these tasks will be subject to delays if you rely on manual data entry. Opening all these emails and copying or typing the data into Salesforce will take an incredible amount of time. And in a world where everything moves super fast, you need to act quickly to maximize your chances of converting leads. If not, they will forget about your brand and turn to competitors.
So how do you overcome this challenge? Well, the answer is one simple but powerful word: automation.
Enter Automation, the Game-Changer in Salesforce Workflows
Salesforce provides a plethora of options for automating day-to-day tasks like follow-up reminders or sending forms. But if you want to automate the data entry process for data to be imported into Salesforce, you need another tool built specifically for that purpose. Specifically, what you need is a tool that can extract the data from your Shopify emails and send it to Salesforce.
On top of saving hours and hours of manual work, which you can then allocate to managing and converting leads, using a data capture tool allows you to prevent data entry errors. Human error is bound to take place whenever a person is performing a repetitive task and can lead to great costs, from bad decisions caused by incorrect information to lost opportunities.

With this in mind, automation is more than a nice-to-have tool for processing emails; it’s a necessity, especially if your Shopify store is growing and you are receiving more and more emails. Automation will relieve you and your team from the tedium of copy-and-pasting information and help you fully streamline your Salesforce workflows.
Once your customer or lead data has been successfully moved to Salesforce, you will be able to take the appropriate actions to engage them further, from offering deals to answering questions, etc.
The best tool to extract and move leads from Shopify to Salesforce is Mailparser, the email parser that replaces data entry and moves your data where it needs to go.
Automate Shopify Leads Data Entry with Mailparser
Mailparser is an email parser that can parse any data in emails into a structured state. You can use it to add new Shopify leads to Salesforce without going through the pain of entering data manually.
On top of extracting data from incoming leads, Mailparser also lets you send it to Salesforce via an integration. This means you directly receive leads on Salesforce as new Records.
How to Add New Shopify Leads to Salesforce with Mailparser
Extracting Shopify lead management from emails and moving them to Salesforce using Mailparser is a straightforward process that doesn’t require any coding knowledge. Here is the step-by-step process you need to follow.
Step 1: Create your Mailparser account
Start by creating a free Mailparser account here. You can keep using all of Mailparser’s features for as long as you want, albeit with a limit of 10 inboxes and 30 emails per month.
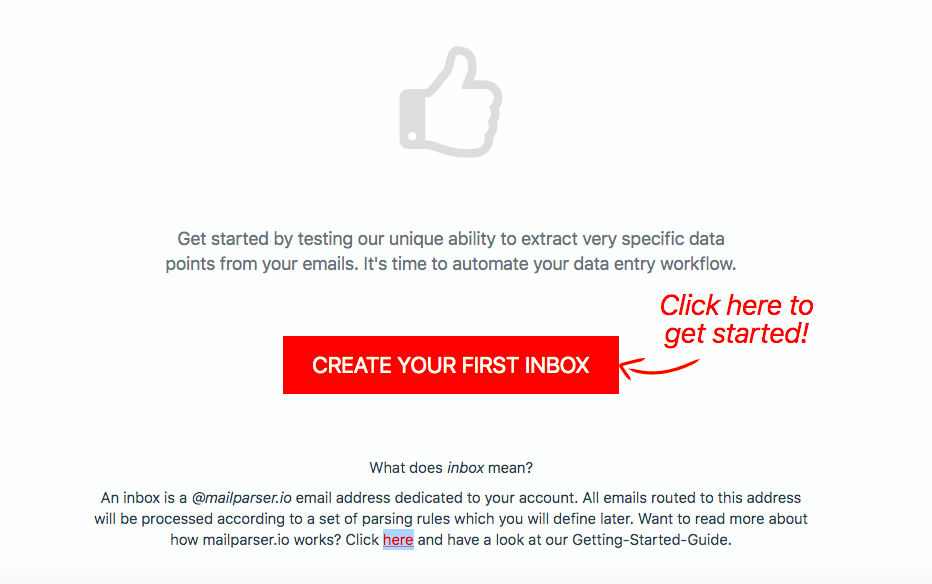
Step 2: Create your Mailparser inbox
Once you create your Mailparser account, you will see a red button prompting you to create your first inbox. Your Mailparser inbox is where your Shopify emails will go to get parsed. Click on it, type a name for your inbox, and Mailparser will create it along with a unique inbox address.
Note that you can create several boxes for different kinds of email – up to 10 with your free account.
Step 3: Forward a test email to your inbox
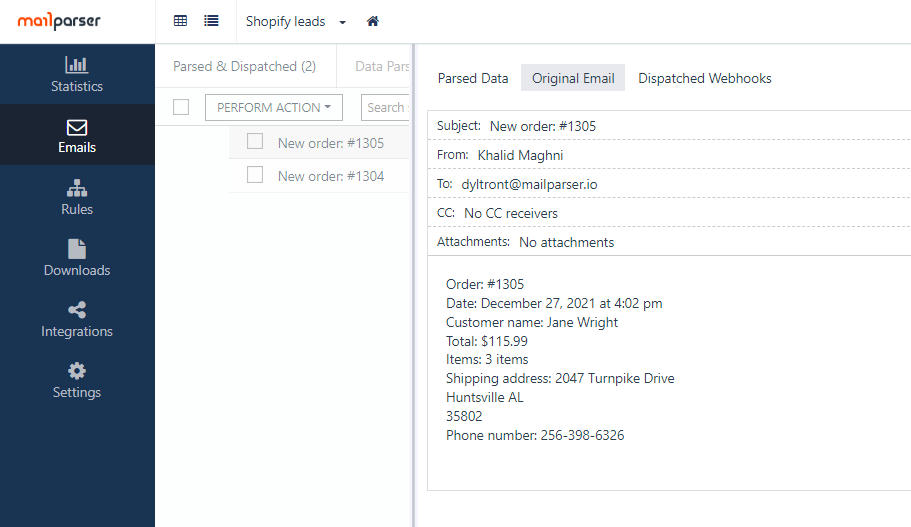
Choose at least two Shopify emails from your inbox and forward them to your Mailparser inbox. They will show up afterward on the Emails section which you can access by clicking on ‘Emails’ on the left-hand side panel.
You can check the contents of the emails by selecting either of them and clicking on the ‘Original Email’ tab.
Pro tip: you can set up your email service provider to automatically forward emails to your Mailparser inbox. This article will show you how to do it.
Step 4: Set up Parsing Rules
Parsing Rules allow Mailparser to identify the data you want and extract it accurately. For emails with simple data fields in the body, you can rely on pre-built Rules to identify and extract data. But you can always edit these Parsing Rules or add new custom Rules to refine the parsing process.
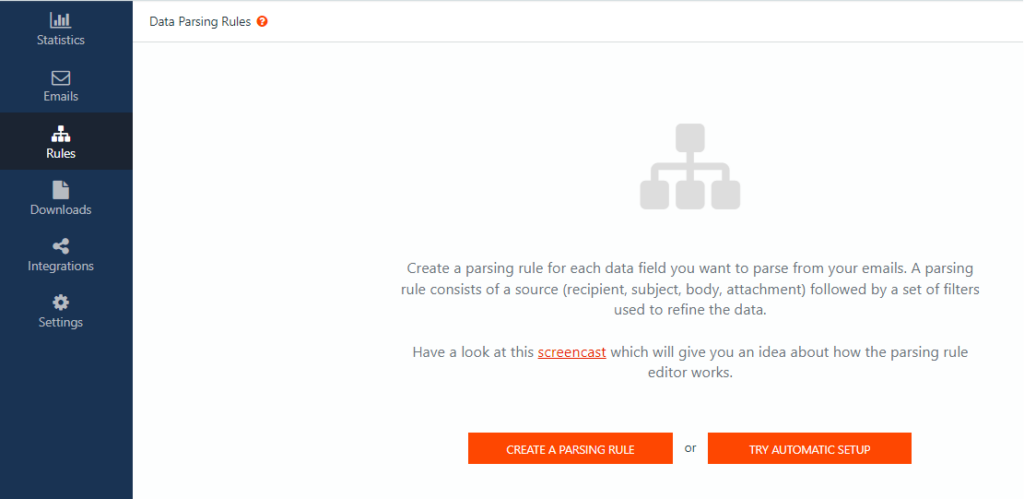
Head over to the ‘Rules’ section on the left-hand side panel and click on the ‘Try Automatic Setup’ button.
Select your sample email from the dropdown list on the left. Next, click on the ‘Generic Machine Created Email’ option from the dropdown list on the right.
All you have to do next is click on the button that says ‘OK, start with this!’ and Mailparser will show you a preview of the parsing results so you can check the accuracy of the extracted data.
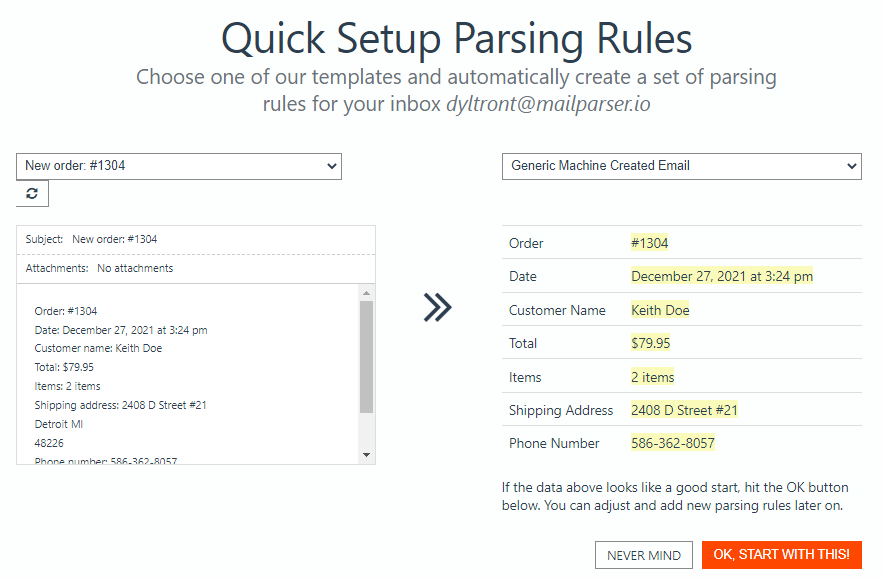
In this case, most of the data in the email has been successfully extracted. However, the shipping address was not fully extracted, so we are going to add a custom Parsing Rule to let Mailparser recognize and extract it.
Step 5: Add Custom Parsing Rules
Keep in mind that this step is not always necessary. There may be cases where the Automatic Setup extracts all the data you need exactly as you want it. We are adding this optional step to give you an idea of how to add a custom Parsing Rule in Mailparser.
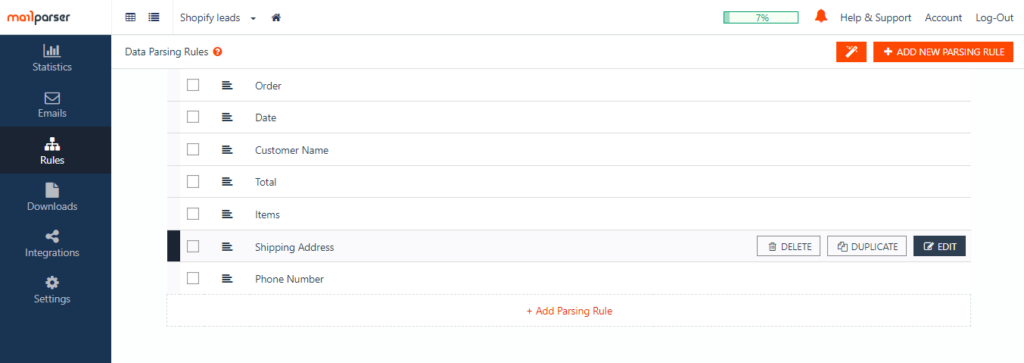
Start by going to the ‘Rules’ section on the left-hand side panel. Move your cursor over the ‘Shipping Address’ rule and click on the Edit button.
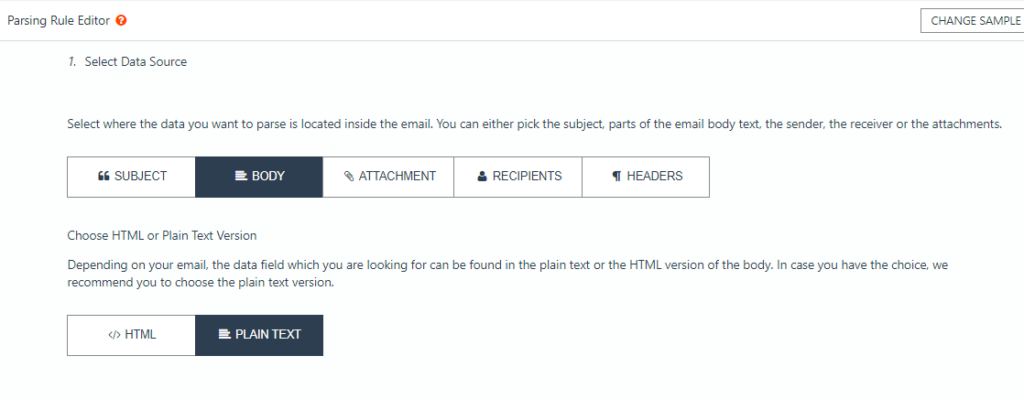
Next, select ‘Body’ as the data source (if it’s not already the case) and then ‘Plain Text’.
Scroll down and you’ll see all the data within the sample email’s body. We are going to show Mailparser where the shipping address data starts and ends so it can isolate and extract it.
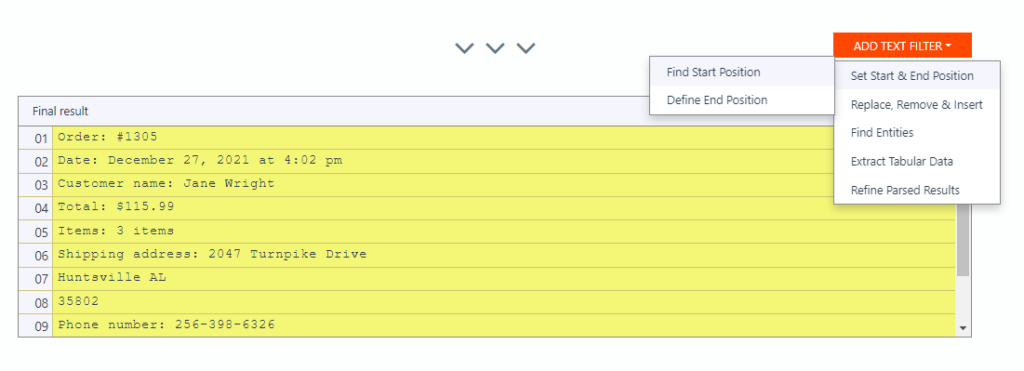
To do that, click on the ‘Add Text Filter’ button on the right. Move your cursor to ‘Set Start & End Position’ and select ‘Find Start Position’.
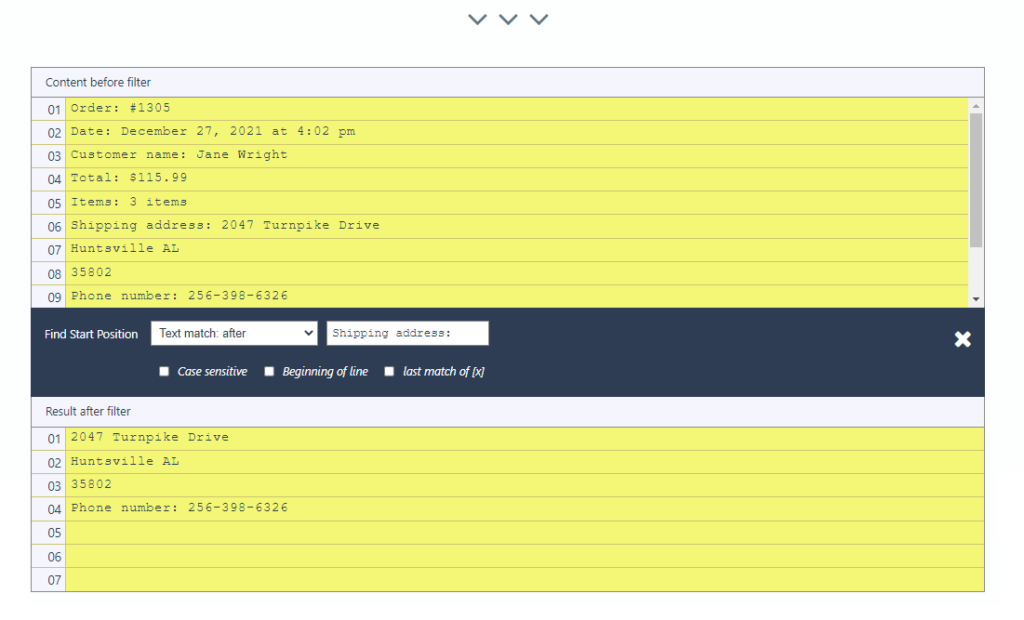
You will see a dropdown menu titled ‘Find Start Position’. Select the option ‘Text match: after’ and type “Shipping Address: “. Be sure to type the space after the colon. Mailparser will remove all the data that comes before that text, as shown in the screenshot below:
Next, we need a second filter to denote where the shipping address data ends. Scroll down past the results of the first filter and click on the ‘Add Text Filter’ button. But this time, instead of choosing ‘Find Start Position’, pick the second option: ‘Define End Position’.
Go to the dropdown menu ‘Define End Position’ and select ‘Text match: before’. Type “Phone”, which is the text that comes right after the shipping address. Now Mailparser will only keep the data between the first filter and the word “Phone”.
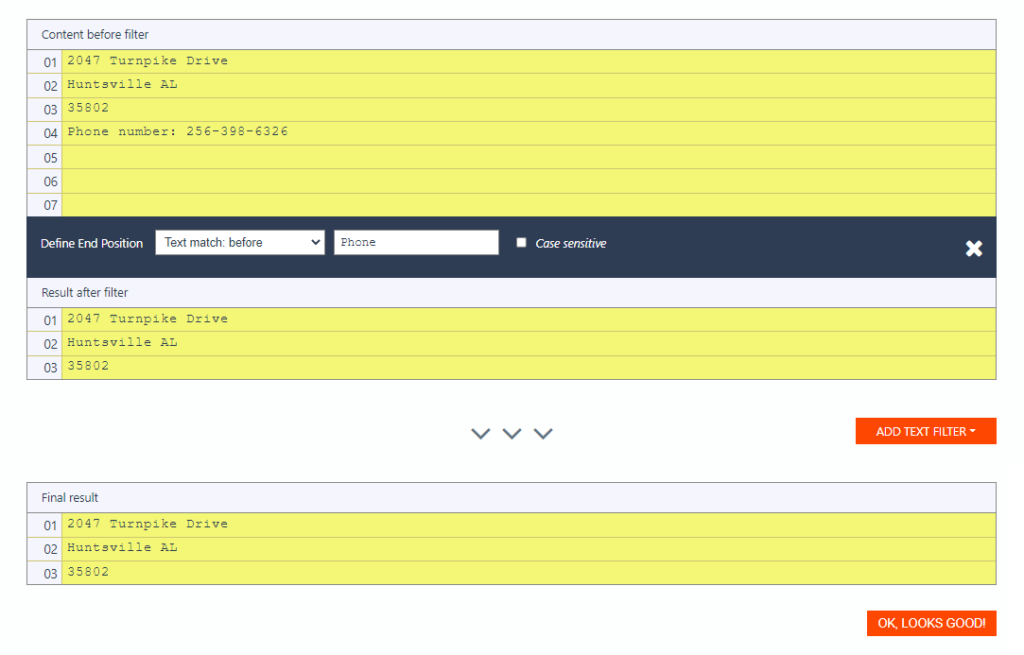
The Shipping Address Parsing Rule now works as intended! Confirm the edits by clicking on the ‘OK, Looks Good!’ button. Click on ‘Validate & Save’ and Mailparser will save the new Custom Parsing Rule.
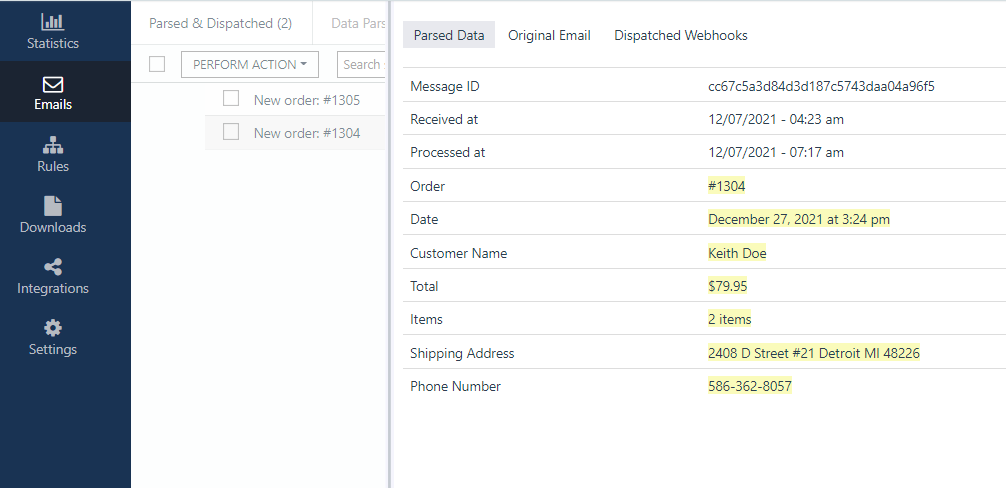
Step 6: Check your parsed data
Return to the ‘Emails’ section and select the two samples emails. Click on the ‘Perform Action’ button right above and select ‘Move to Parsing Queue’. Mailparser will start the parsing process shortly and extract the data within emails according to the Parsing Rules.
After that, click on each email to verify the parsing result.
Step 7: Set up an integration with Salesforce
All that’s left to do is to set up an integration with Salesforce. Mailparser uses Zapier to send the extracted data to Salesforce.
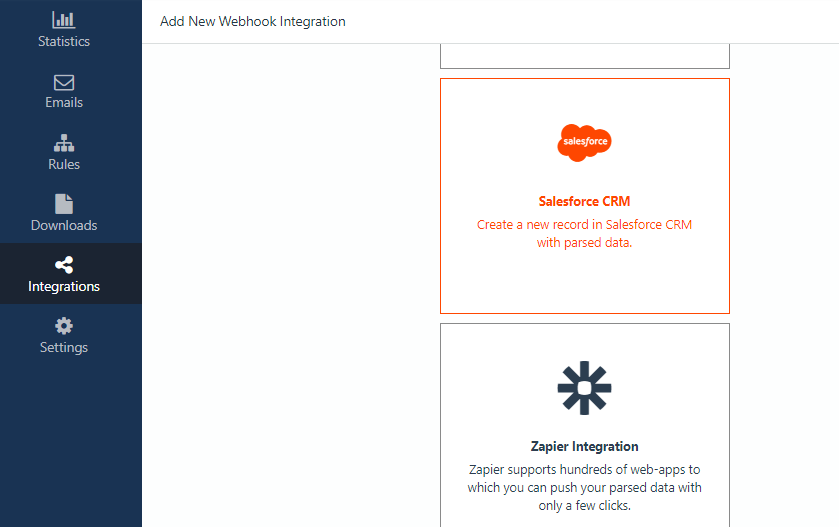
Go to ‘Integrations’ on the left-hand side panel and click on the button ‘Add New Integration’. You’ll find several integration options. Click on the one for Salesforce.
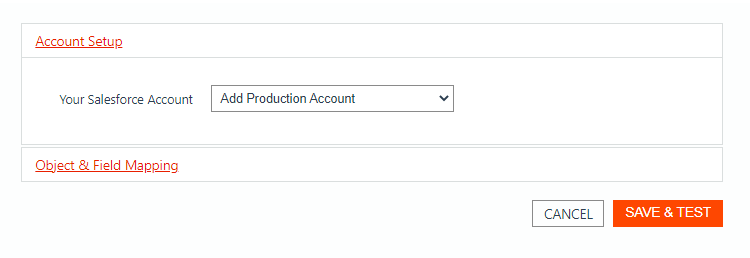
Select either ‘Production Account’ or ‘Sandbox Account’ and you’ll be prompted to log into your Salesforce account. If you are already logged into your Salesforce account on your browser, Mailparser will simply ask you to allow access to it.
In the second dropdown list, select ‘Lead’.
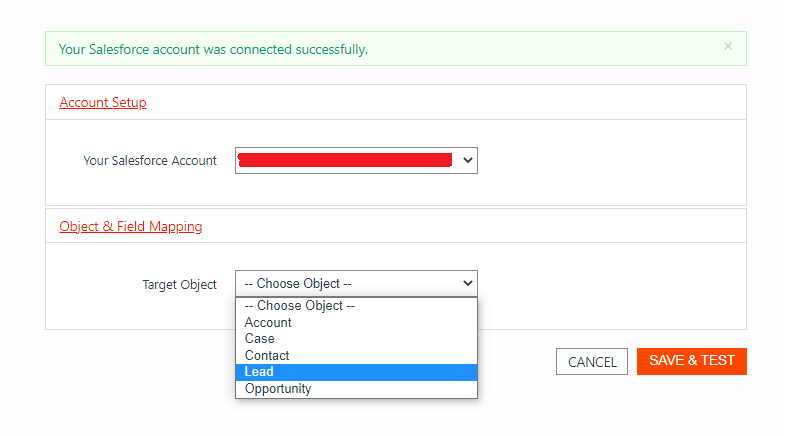
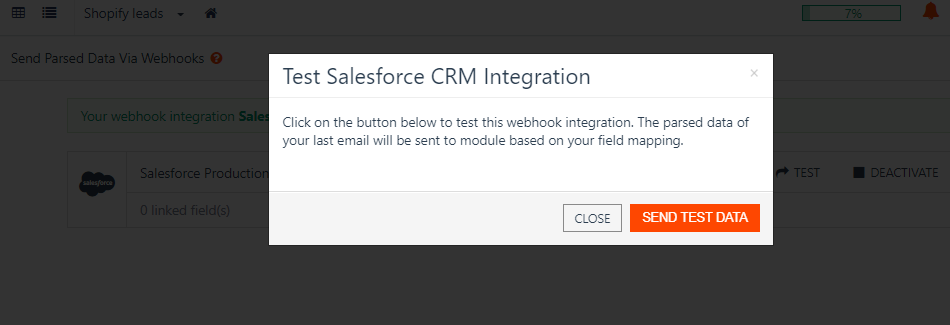
After that, click on ‘Save & Test’. A window will pop up asking you to send the data from your sample emails to Salesforce to test the integration. Click on the ‘Send Test Data’ button.
A new Record will be created in Salesforce every time Mailparser parses emails and exports data to it. Now your leads are on Salesforce and you can immediately move them further down the Sales Path.
And that’s how you add new leads from Shopify to Salesforce with Mailparser!
Mailparser FAQ
Can I extract data from email attachments?
Absolutely. Mailparser allows you to extract data from an email’s subject line, body, and attached files like spreadsheets or Word documents.
Can I download my parsed data?
Yes. Instead of sending your parsed data to a cloud application, you can download it to a file in CSV, XLS, JSON, or XML format.
Can I integrate Mailparser with other CRMs or cloud applications?
Yes, you can! In fact, Mailparser allows for integration with 1,500+ cloud apps. So even if you switch from Salesforce to another platform, you will still be able to move incoming leads there.
What if I want to extract data that is not in emails?
In that case, you can try our companion app, Docparser. This document parser works similarly to Mailparser and can extract data from documents of various formats.
In Conclusion
Shopify success requires more than offering quality products. You must also streamline your processes to capture all opportunities and minimize inefficiencies. If you use Salesforce to that end, automation will massively speed up your Salesforce workflows by taking care of the data entry process. You will then be able to manage and convert leads faster and make more sales.
Mailparser lets you do this by extracting data from incoming Shopify emails. Adding Mailparser to your cloud stack will help you move data seamlessly from emails to Salesforce or any other cloud platform. Sign up for a free account today and start adding new Shopify leads to Salesforce.