Every day, professionals receive important table information by email that they need to move to an Excel worksheet. That data could be anything from sales data to inventory updates, survey responses, employee information, etc. Getting this data in a single spreadsheet is necessary for manipulation, analysis, and decision-making. Whatever the case, doing this manually is likely to take time. But since you found this post, you already know that there’s a much more efficient and accurate method: use an email parser to parse a table from an email to Excel. Keep reading to find out how to do this quickly and easily with Mailparser.
Extract Data from Emails with Mailparser
Save countless hours of tedious data entry and streamline your document-based workflows.
No credit card required.
How to Parse a Table from an Email to Excel with Mailparser
Automating repetitive tasks has never been easier thanks to tools like Mailparser. You can pull any data trapped in your emails, whether in the subject, body, or attachments, and either download it or send it to a cloud-based application. The best part is that you can do this in just a few minutes, without having to set up a VBA macro within Excel. As a result, you will save countless hours of tedious manual work and benefit from higher data accuracy (more on that further below).
So let’s see how Mailparser works. Follow these four simple steps to parse a table from an email to Excel.
Step 1: Create your first Mailparser inbox
First, sign up for a Mailparser free trial. You can try all of Mailparser’s features right away for free, with no upfront commitment like entering your credit card information.
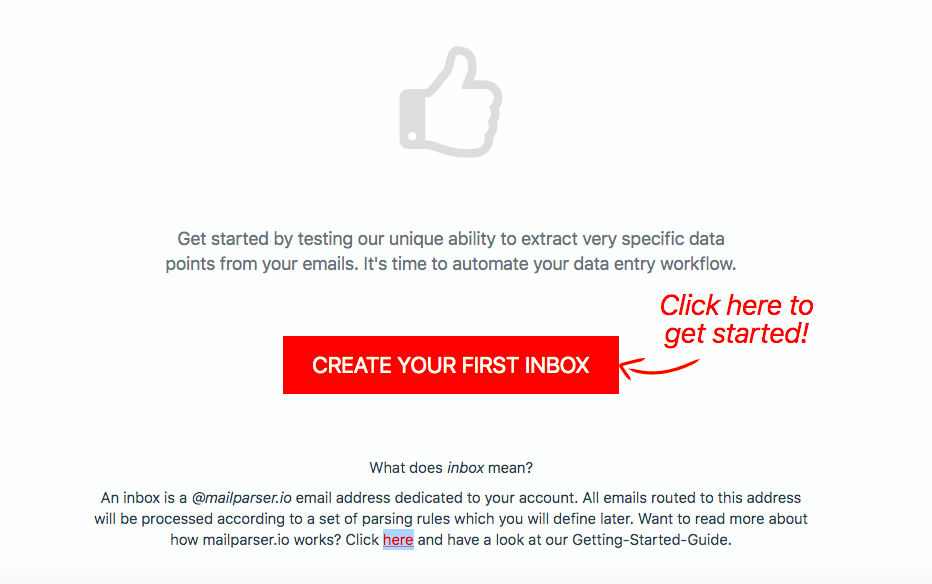
After creating your account, you will see a prompt to create your first inbox, which is where you will send your emails to get parsed. Click on the button, type a name for your inbox, and you will get an email address for your Mailparser inbox.
Step 2: Forward a sample email
Select one or several emails from your inbox and forward them to your Mailparser address.
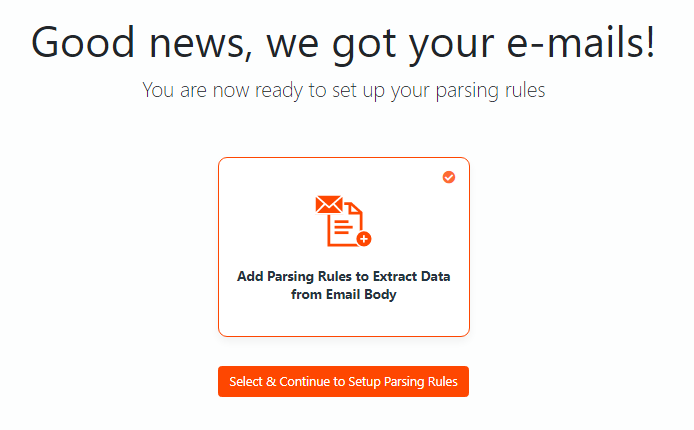
Click on the button ‘Select & Continue to Setup Parsing Rules’.
Step 3: Create Parsing Rules
Parsing Rules are the instructions that Mailparser’s algorithms follow to identify and extract data from emails. To parse a table from an email to Excel, you need to set up a Rule that can extract the table from the email’s body.
Mailparser has many templates for common use cases such as real estate leads, food delivery orders, vacation rentals, etc. For this example, we have created a table with fictional data serving as a shipping update. While there isn’t a template for this specific case, creating Parsing Rules is still an easy and quick process.
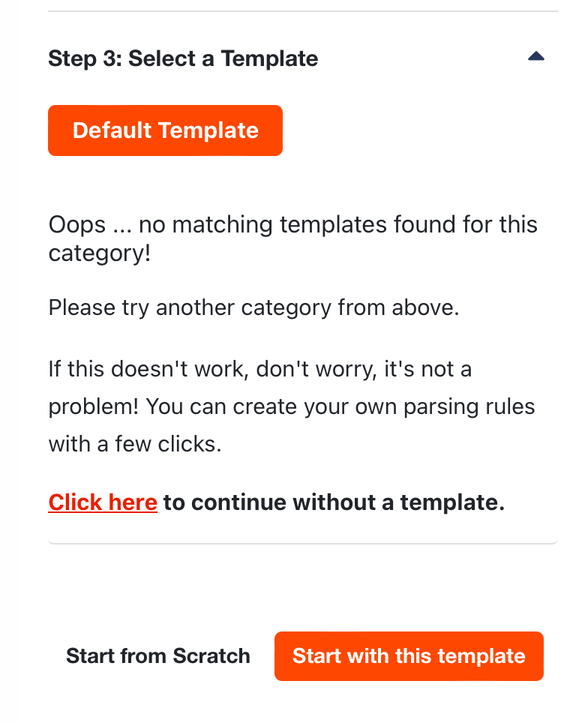
Scroll down to the bottom and click on ‘Click here’ to continue the setup process without using a template.
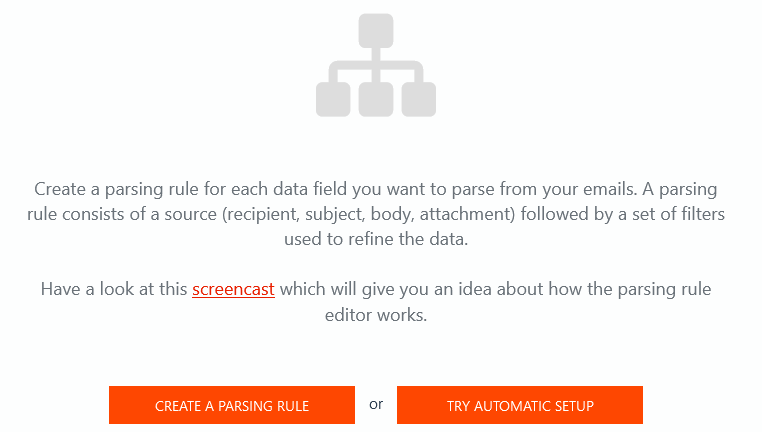
You will be taken to the ‘Rules’ section of your dashboard. There, click on the button ‘Create a Parsing Rule’.
Now, you need to select the data source, which in this case is the email’s body. So click on ‘Body’, and after that, click on ‘HTML’.
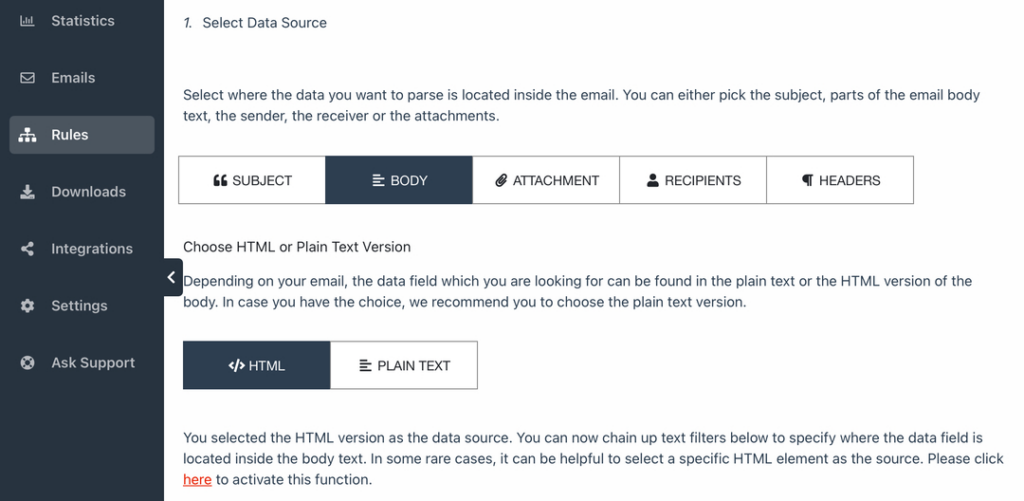
Scroll down and you’ll see that Mailparser has extracted all the data in the email’s body. Since we only want to extract the table, we’ll create a Parsing Rule that identifies and extracts any table within the email.
To do this, click on the button ‘Add Text Filter’, move your cursor down to ‘Extract Tabular Data’, and select ‘Get Tables from HTML’.
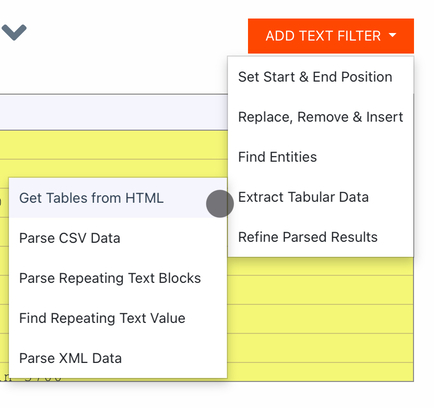
Check the parsing results and you’ll find that the table has been successfully extracted!
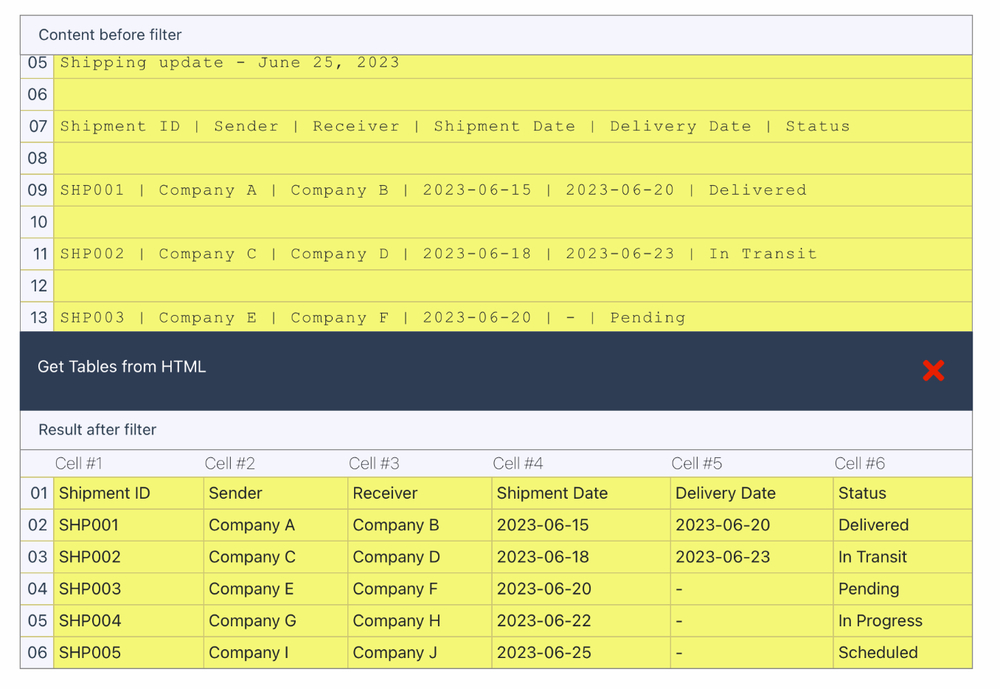
As you can see, the whole process only took a few clicks.
Scroll down to the bottom of the Rule editor and click on the button ‘OK, Looks Good!’. Type a name for your Parsing Rule (e.g. shipping update table) and click on ‘ Validate & Save’.
Note that if you wish to modify the table before validating the Rule, you can add table filters to do things like:
- Filtering rows
- Merging columns
- Formatting dates
- Calculating a new column
- And more
Alright, now you can move on to the last step: downloading your parsed data to Excel.
Step 4: Download your data to Excel
Go to the ‘Downloads’ section on the left-hand side panel and click on the button ‘Create First Download Link’.

Select the Excel format from the options available (XLS, CSV, JSON, and XML). Type a name for your spreadsheet, tweak the spreadsheet settings if you want to, and click on the button ‘Save’ at the bottom.
Image: excel file download
Mailparser will generate a download link; all you have left to do is to click on it and save your Excel file. Congrats!
Optional: Export your data to Excel Online (or another app)
Alternatively, you can also send the table data to Excel Online, Google Sheets, or any cloud app that you use via an integration. To do this, go to the ‘Integrations’ section, click on ‘Add New Integration’, and select the application you want to export data into.
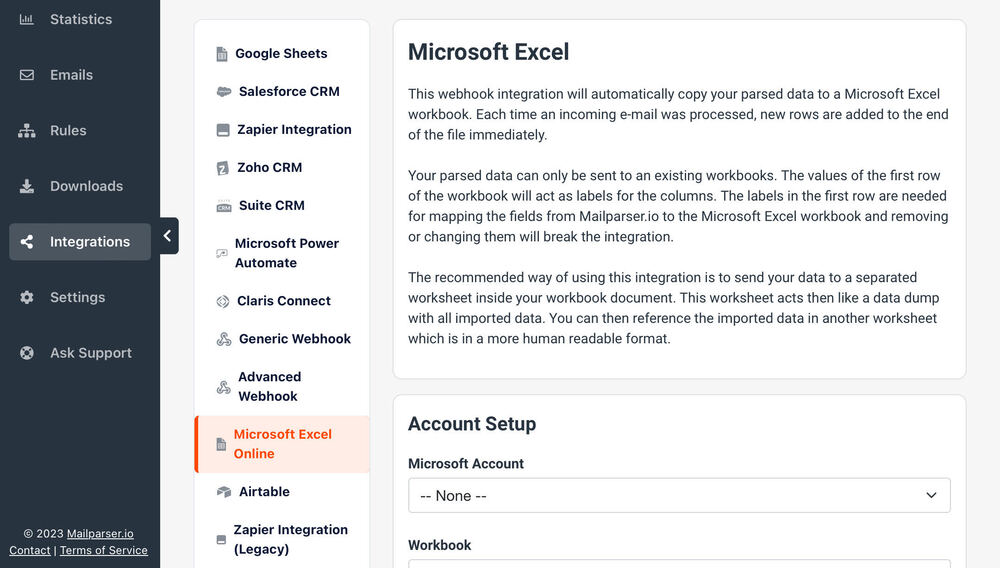
Follow the simple instructions provided, which consist of logging into your account on Excel (or another app) and choosing the desired spreadsheet where you want the data to go.
So that’s all you need to do to parse a table from an email using Mailparser. The whole setup process shouldn’t take long—probably just a few minutes.
Also, keep in mind that you can build multiple parsers, each for a specific use case, meaning you can use Mailparser for all your email parsing needs. Take a look at our case studies to get an idea of the different ways you could use Mailparser.
Extract Data from Emails with Mailparser
Save countless hours of tedious data entry and streamline your workflows.
No credit card required
Why Use Mailparser to Parse Emails?
To be fair, there are other tools you could use to parse a table from an email to Excel. So you might be wondering why you should choose Mailparser for your data extraction needs. If so, great question! Here is why you’ll probably end up loving Mailparser.
Save your time for more important work
If you can’t afford to spend hours inputting data on Excel, let Mailparser do that for you—in a matter of moments—and move on to more important (and sometimes urgent) tasks, whether it’s approving invoices, following up with leads, or anything else that moves the needle and feels more rewarding to perform.

No need to use code
As we said above, Mailparser requires no technical knowledge at all.
So if you (or your coworkers) don’t have the coding skills to create a parser, you can still populate a spreadsheet with new data without writing a single line of code. So anyone in your organization can add data from emails to a database whenever they need to, without wasting time entering it manually or needing someone to set up a parsing macro for them.
Customize the parsing process as needed
As shown in the previous section, it’s easy to set up a Parsing Rule to parse a table from an email to Excel.
But beyond data extraction, Mailparser allows you to fine-tune your Parsing Rules with filters so that tables are extracted with the exact structure and formatting that you want, from sorting values to calculating new columns, adding column headers, filtering unneeded rows, and a lot more.
So be sure to explore the various filters at your disposal to clean up data to perfection and eliminate the need to edit it post-extraction.
Mailparser Is Scalable to Your Needs
Whether you’re processing a few emails per day or handling high-volume email streams, Mailparser scales to meet your needs. As your business grows, so will the amount of data to process. Manual data entry can only be relied upon up to a certain point, after which it becomes too stressful and creates bottlenecks in workflows. Mailparser prevents that scenario by effortlessly handling large volumes of emails while maintaining efficient parsing and data accuracy.
Integrate with your favorite cloud apps
In addition to Excel and Google Sheets, you can use a third-party integration platform like Zapier to connect your Mailparser to virtually any cloud application. Think of the possible applications: getting a notification on Slack, automatically adding a new record on your CRM, creating a ticket on Zendesk…
By moving data from emails to the cloud apps you use, you reduce the amount of boring work to do. You also ensure that crucial information is not confined to individual inboxes but is accessible to authorized users wherever they are, making for better collaboration.
Mailparser FAQ
What are the other formats that I can parse email data to?
In addition to Excel, you can parse email data to CSV, JSON, and XML.
Can I parse tables from email attachments?
Absolutely! Mailparser can extract data from an email’s subject, recipient, body, and attachments.
What if I need to parse documents received via channels other than email?
In that case, we suggest you use Docparser, the sister app to Mailparser that focuses on document parsing. If you need to extract data from documents that are too large to be sent by email, or stored in the cloud, you can import them into Docparser and set up Parsing Rules to extract the data you need, similar to how Mailparser works.
What about security?
Data security is a big concern for businesses, and as such, we take it very seriously. We use bank-level encryption and update our servers with the latest security patches regularly. Hundreds of businesses rely on Mailparser for their email parsing needs without any issues.
In Conclusion
Being able to move data from recurring emails to your systems quickly, without losing accuracy, is necessary to keep your workflows smooth and your business competitive.
By using Mailparser to extract tabular data from emails, you will eliminate the need for manual data entry, move tables to Excel (or any cloud app) quickly, and enjoy a reliable and scalable solution for all your email parsing needs. So give it a try today and see how convenient automation can be.
Extract Data from Emails with Mailparser
Save countless hours of tedious data entry and streamline your document-based workflows.
No credit card required.
