
How to Export Outlook Emails to Excel Automatically with Mailparser
Mailparser is a web-based tool that is designed to automatically extract data from any number of emails according to a set of instructions, effectively saving you a great deal of time and effort. Mailparser then sends your data either to an Excel file or a cloud application via a webhook. Here is how to use it step by step.
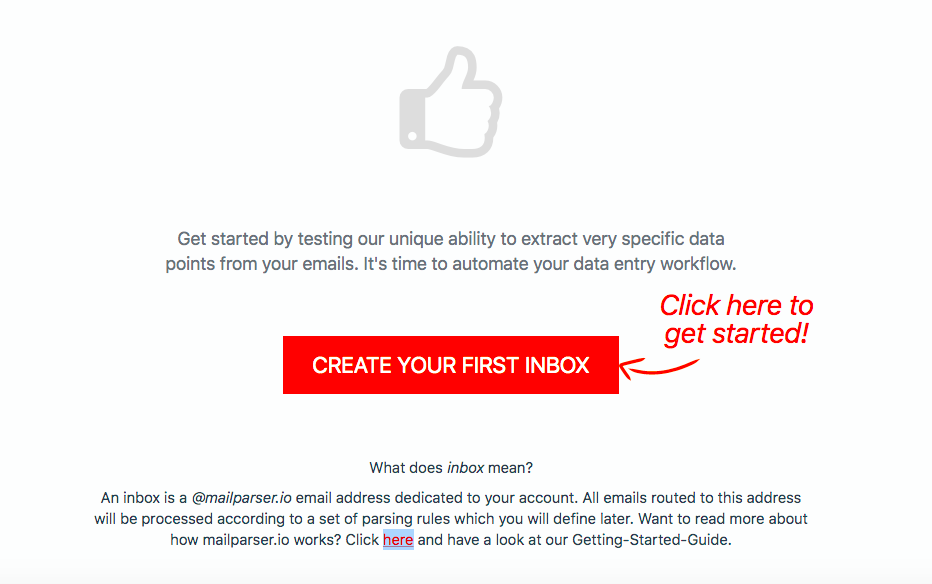
Step 1: Create a free Mailparser account
Sign up for a free Mailparser account. It only takes a few moments and you don’t need to enter your credit card information.
Step 2: Create your inbox
Mailparser allows you to have one or several inboxes where you receive emails.
Once you create your account, click on ‘Create Your First Inbox’.
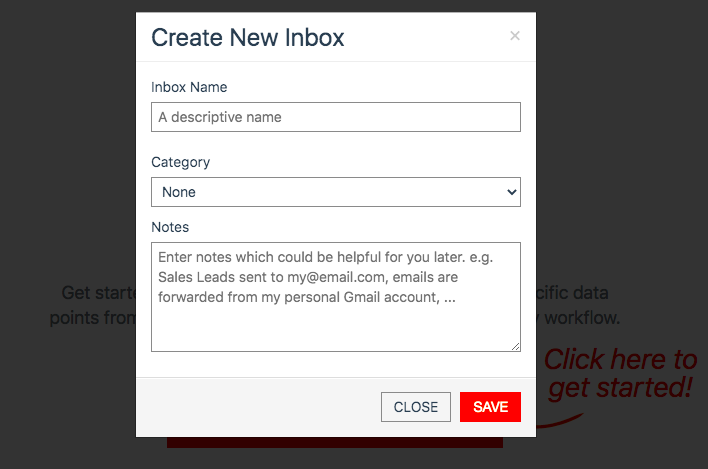
A pop-up window appears, asking me to give the inbox a name. Once you type a name, click on ‘Save’. In this example, the inbox is called “Customer Satisfaction Surveys”.
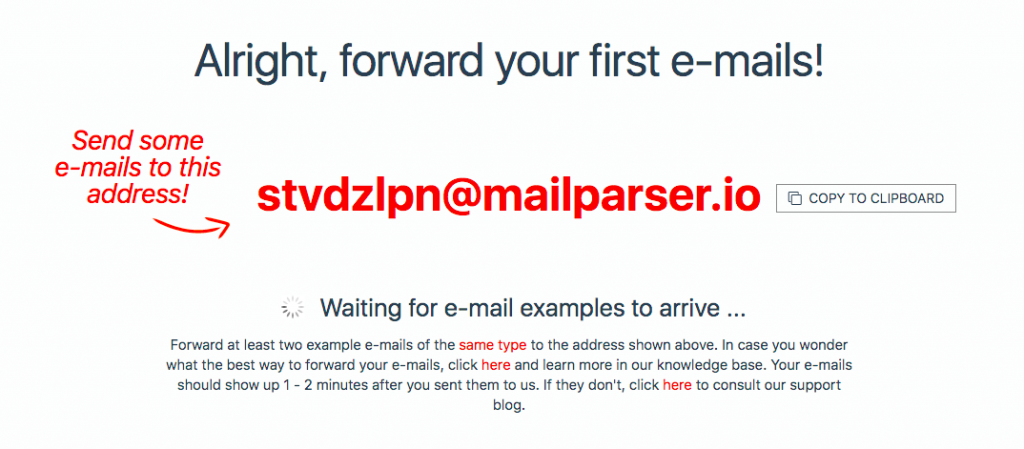
Mailparser instantly creates an inbox with a unique email address assigned to it. This is where you are going to send your Outlook emails, as the following screenshot suggests:
Step 3: Send a few test Outlook emails to your inbox
For the purpose of this example, I’m going to send a few emails with fictional business data to the Mailparser email address.
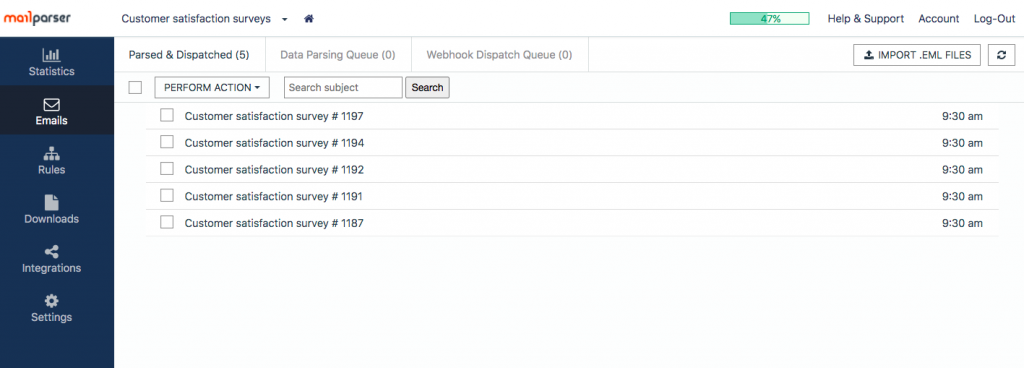
From the top left of your Mailparser account, click on ‘Select Inbox’ and select the name of your inbox at the top left of your screen and select your inbox.
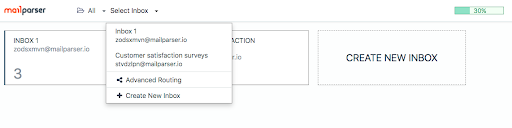
You will find the test emails you just sent in your inbox.
Now, we need to set parsing rules Mailparser will follow to parse data from the emails. Parsing data is the process of identifying, rearranging, and extracting data. This is how Mailparser will take the information from your Outlook emails and export them to an Excel file where it’s structured and ready to be used.
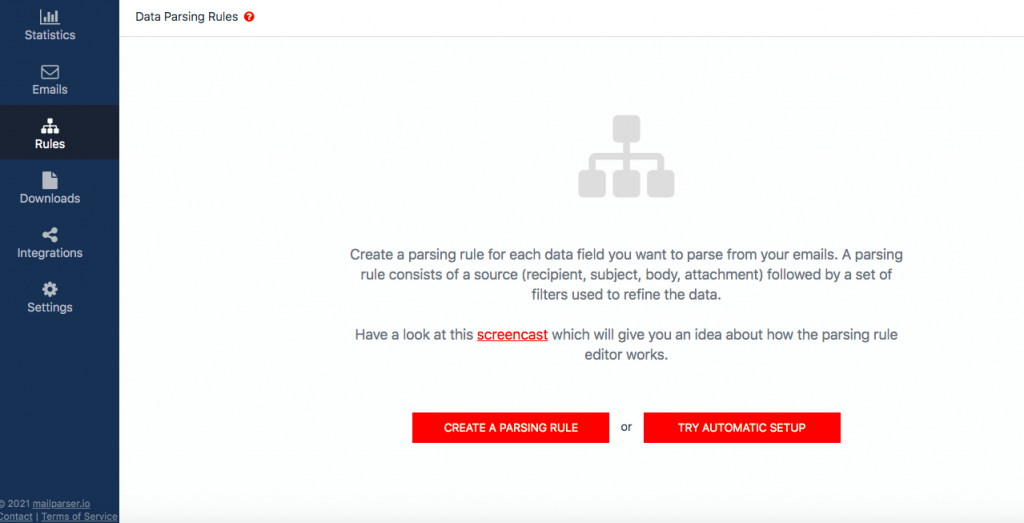
Step 4: Add parsing rules
Each inbox in your Mailparser account has a number of parsing rules that tell Mailparser how to parse data from emails. Each rule will correspond to one column on the Excel spreadsheet that Mailparser will later generate.
Move your cursor to the left-hand side panel and click on ‘Rules’. You will find two buttons:
- ‘Create a Parsing Rule’. This option allows you to create a custom parsing rule.
- ‘Try Automatic Setup’. This option allows you to choose a set of parsing rules automatically created by Mailparser. This is very convenient when you want to extract simple, common business data. This is the option we’ll go with for now.
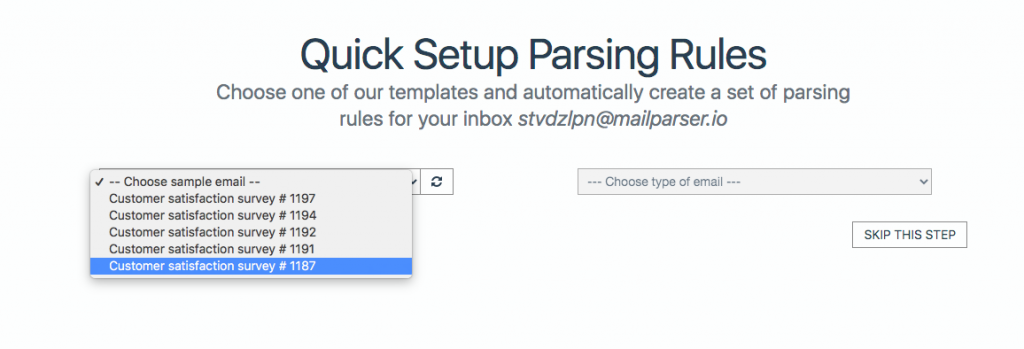
Click on ‘Try Automatic Setup’. On the next screen, choose one of the sample emails:
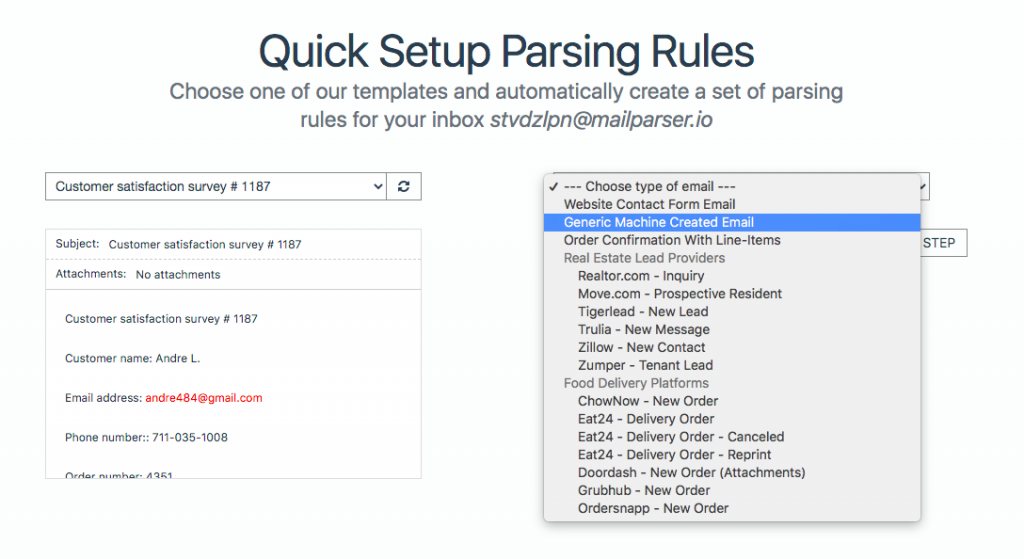
Next, choose ‘Generic Machine Created Email’ from the drop-down list on the right.
Mailparser will parse the data in the email and show you a preview of the result:
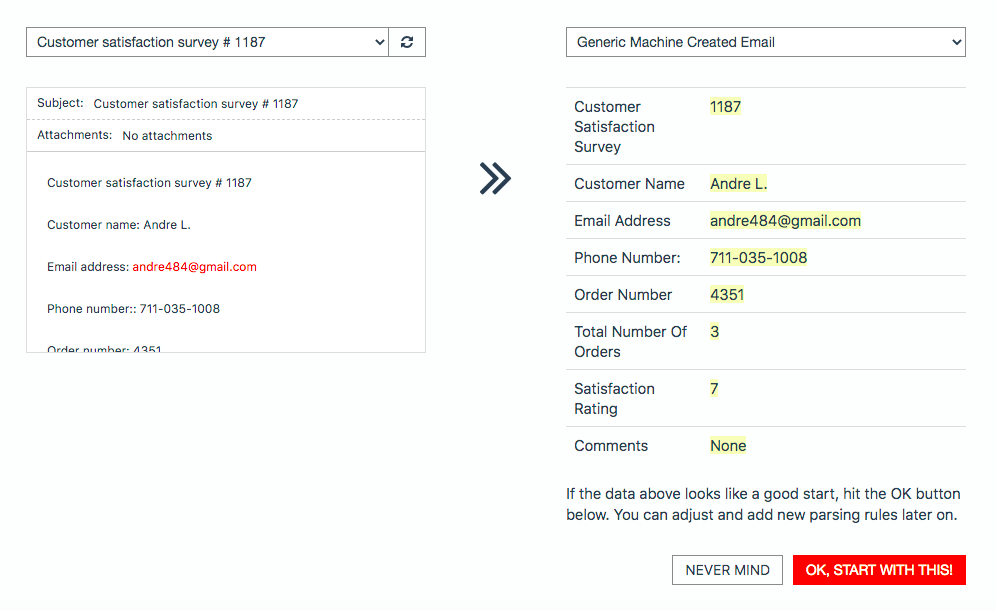
Click on ‘OK, Start with This!’ and you will find that eight parsing rules have been automatically created.
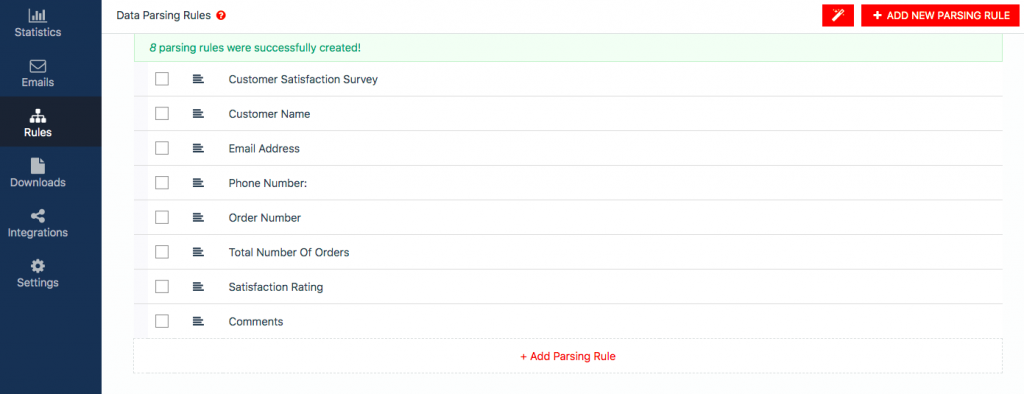
You can already see that Mailparser has accurately identified the information within the emails and extracted it. But before we export the data to Excel, we need to add one custom parsing rule for a data field that has yet to be parsed. Each of the sample emails contains a sentence that reads, “Likely to recommend our products:” with a number next to it. To pull that data from each email, we are going to add a new parsing rule.
Click on either ‘+ Add Parsing Rule’ at the bottom or the ‘+ Add New Parsing Rule’ button at the top right.
Now, go to ‘Rules’ on the left-hand side panel and select ‘Body’ to set your email’s body as the data source. Next, select ‘Plain Text’ from the two options right below.
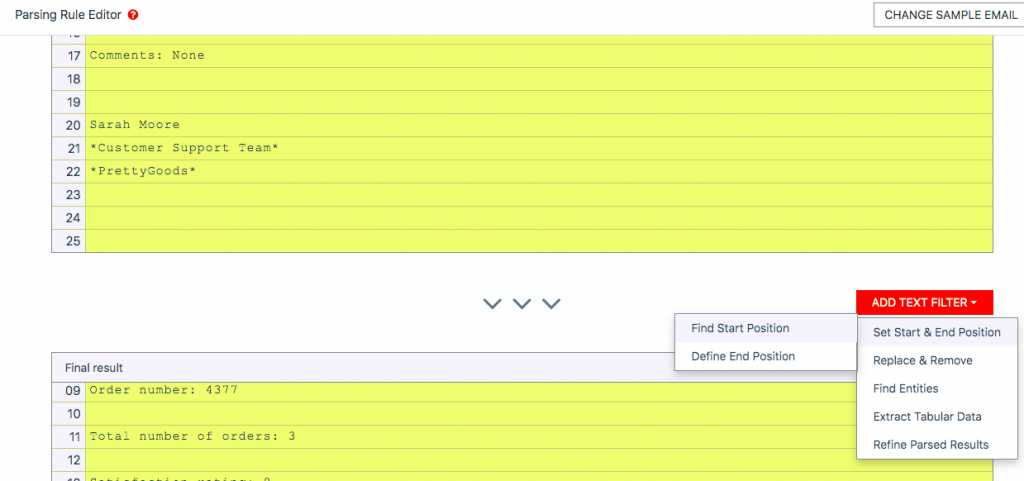
Scroll down until you see the orange button on the right that says ‘Add Cell Filter’. This is the button you can use to add filters. A filter is an instruction you give Mailparser to isolate the data you want and arrange it however you want. You can chain up as many filters as you want to create your custom parsing rule.
The first thing we want to do here is to remove all the text that comes before the line that reads “Likely to recommend our products” since it’s the only information that Mailparser has not parsed yet. To do this, click on the ‘Add Cell Filter’ button. You will see a drop-down list. Move your cursor to ‘Set Start & End Position’ and select ‘Find Start Position’.
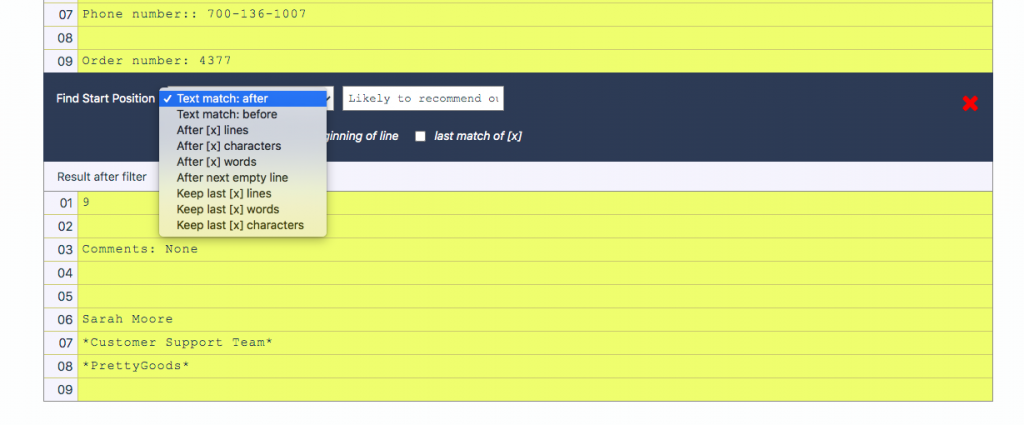
In the drop-down list that appears below, there are different criteria you can choose to isolate the data you want. In this case, we’ll use ‘Text match: after’ and, as you can see, It’s selected by default. Next, you need to write the text that Mailparser will use to recognize where the data we want begins. Type the sentence “Likely to recommend our products: ”. Don’t forget to add the blank space after the colon because the data we want – the rating given by the customer – begins right after that blank space.
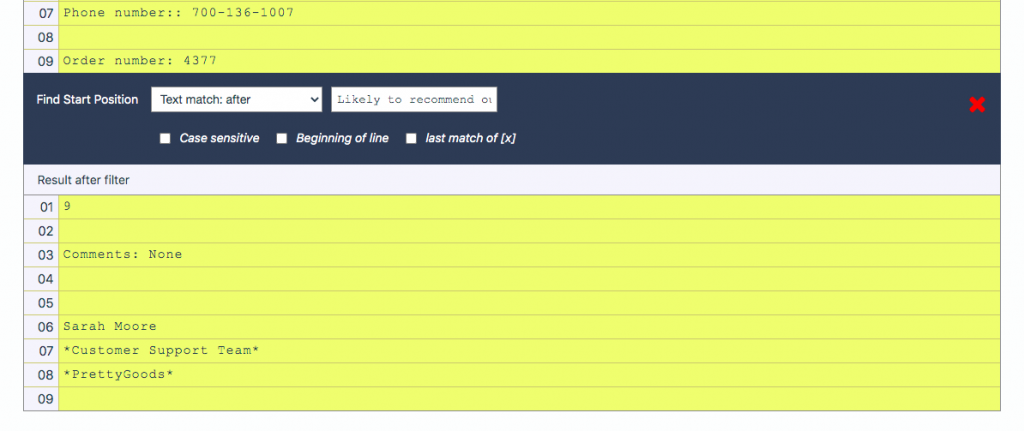
Mailparser will then display the result you will get after adding the filter so you can make sure your data has been isolated just like you want.
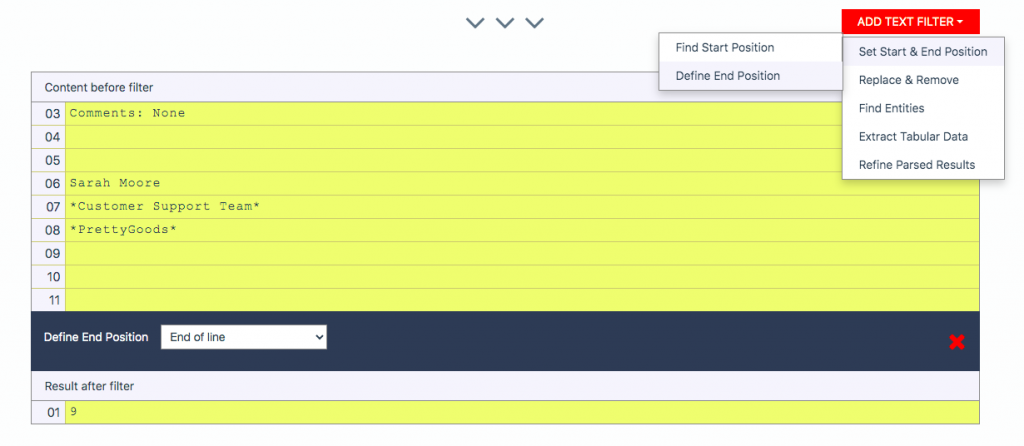
We are almost there – we just have to remove the data that comes after the line containing the customer rating.
Click on the orange button below to add a new filter. This time, go to ‘Set Start & End Position’ in the drop-down list and select ‘Define End Position’. A drop-down list of criteria will appear right below. The one we need is ‘End of line’ and it’s selected by default.
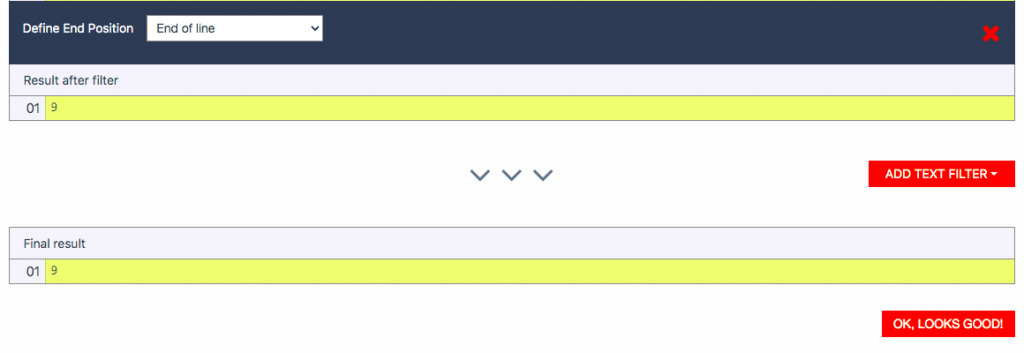 The new parsing rule is now complete! Mailparser will be able to extract the recommendation rating from all emails that have a similar structure. Scroll down to the bottom of the rule editor and click on the ‘OK, Looks Good!’ button on the right.
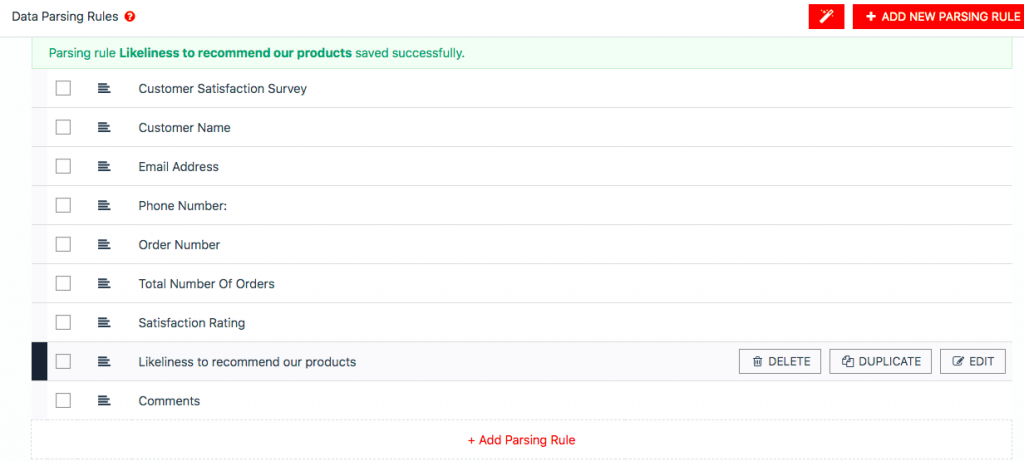
Mailparser will take you back to the list of parsing rules, with the new one being at the bottom. Let’s move it above the ‘Comments’ parsing rule to match the information order in the emails. Click on the black rectangle to the left of the ‘Likeliness to recommend our products’ rule and drag it one row above.
This Mailparser inbox is now set to parse data from all incoming emails. Next, here is how to export Outlook emails to Excel.
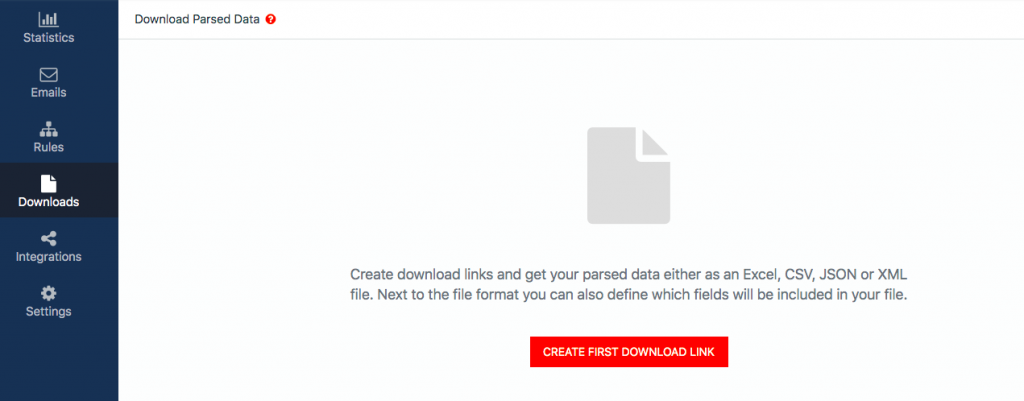
Step 5: Export your parsed data to Excel
All that’s left is to export your parsed Outlook emails to Excel. Go to ‘Downloads’ and click on the button ‘Create first download link’.
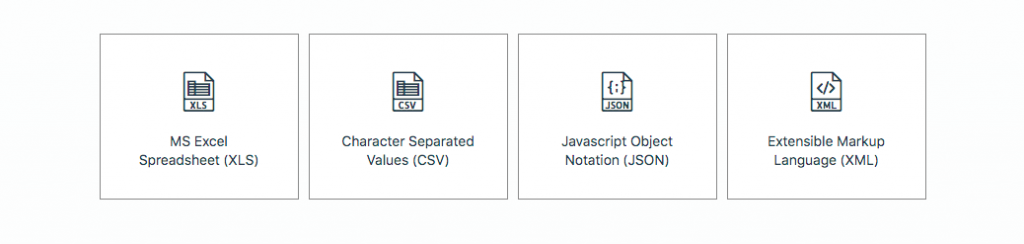
Click on ‘MS Excel Spreadsheet (XLS)’.
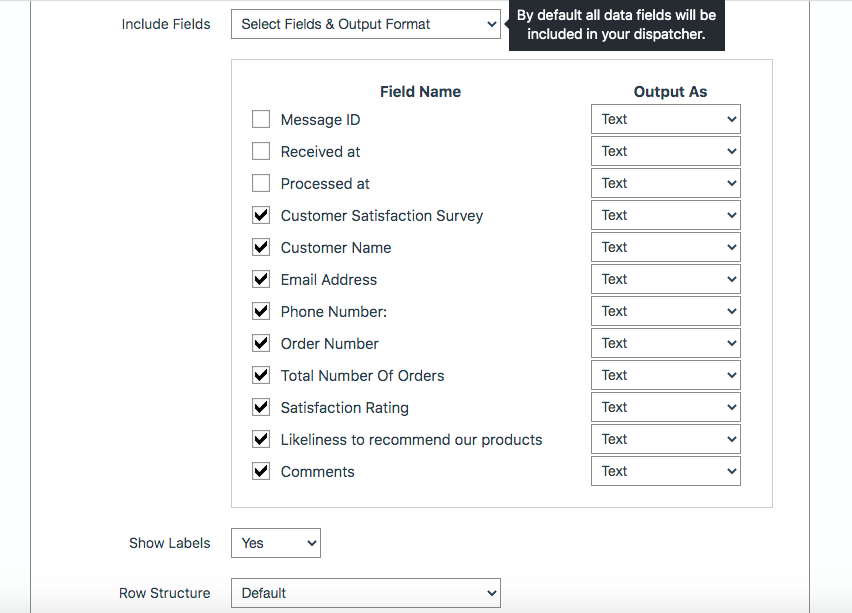
In the next screen, type a name for your Excel file and choose how many emails you want to export to Excel. For this example, we’ll just leave the default option ‘Last 100 Emails’ selected. Next, go to the ‘Show Labels’ list and choose ‘Select Fields & Output Format’.
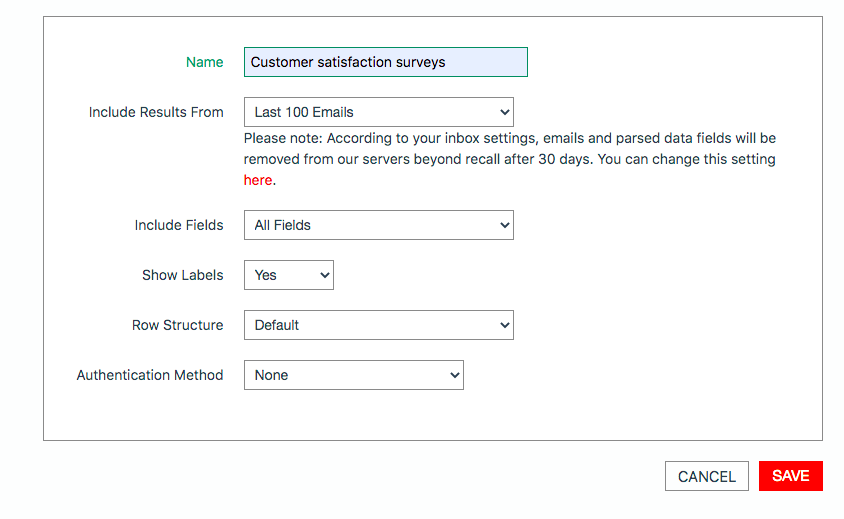
Uncheck ‘Message ID’, ‘Received at’, and ‘Processed at’ since we don’t need this information to be included in the Excel file. Once you do that, click on the ‘Save’ button at the bottom.
Mailparser will generate a download link for your Excel file. Click on it and your browser will download the file.

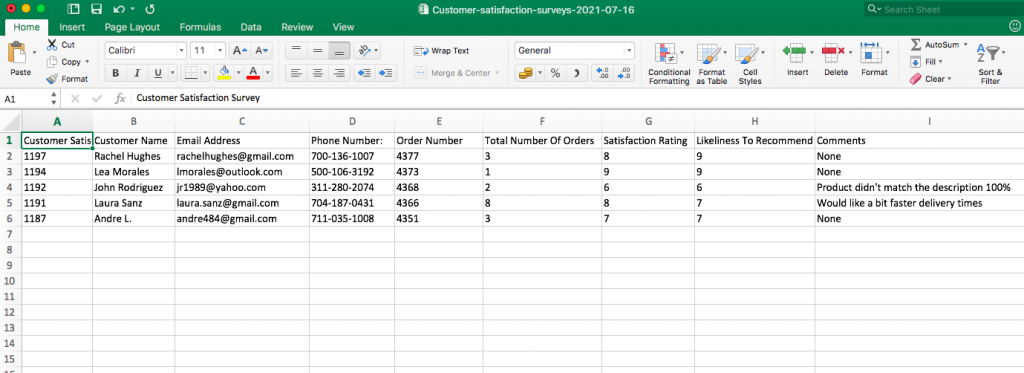
Congratulations! Your Outlook emails have been extracted to Excel. Open your file to see the result:
And that’s how to export Outlook emails to Excel using Mailparser. As you can see, doing this is simple and requires no technical skills like coding or dabbling with VBA.
Step 6: Set up Outlook to automatically forward the emails you want to Mailparser
You can set up Outlook to automatically forward specific emails to your Mailparser inbox. To learn how to do this, read this article.