How to Create an Outbound Email Integration
1. Build your inbox
First, you need an inbox with a set of parsing rules to extract the information you need from emails. You already know how to do this:
- Create an inbox
- Send a sample email to your inbox
- Build parsing rules
If you already have an inbox that extracts the data you need to send, just open it and go to the next step.
2. Connect your email account
Now, go to the Integrations section and click on the button ‘New Integration’.
Choose Gmail or Outlook from the integration options. Then, connect your email account to Mailparser via OAuth.
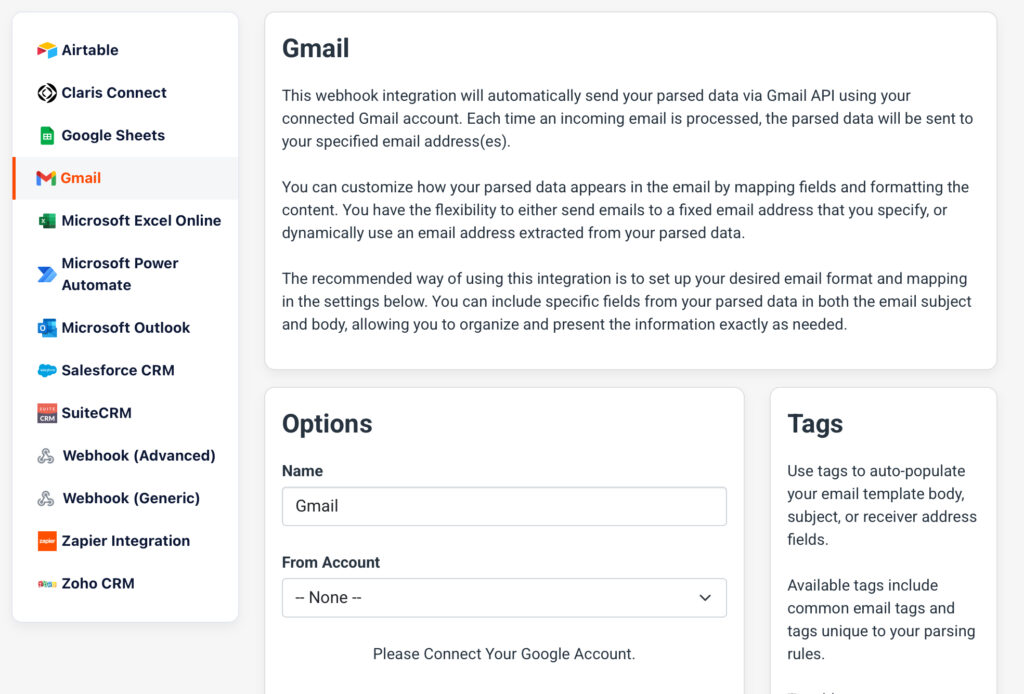
Once connected, create a template for your automated outbound email.
3. Configure your outbound email template
Here you can configure the settings of your outbound email, as seen in this screenshot:
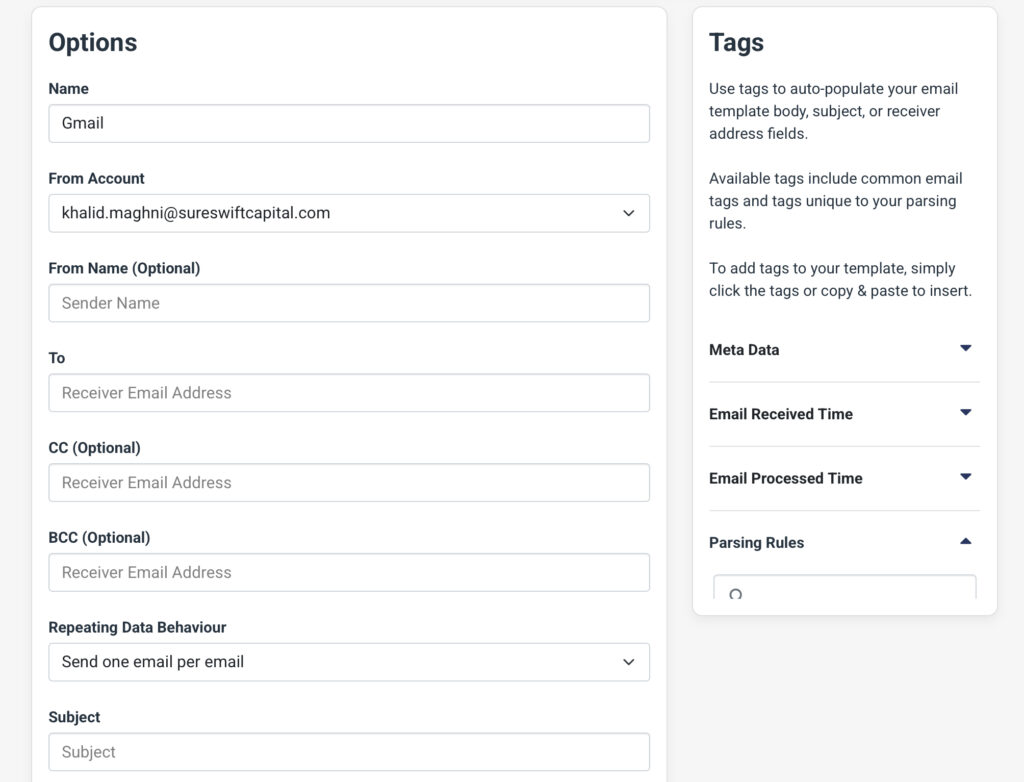
To customize your template, you have access to the following options:
- Name: A label for your own reference
- From Account: Choose the connected Gmail or Outlook account
- From Name (Optional): Type the sender’s name that appears in the recipient’s inbox
- To: Use a fixed email address or insert a dynamic tag such as {{customer_email_text}} to send a value extracted from the email
- CC / BCC (Optional): Add additional recipients
- Repeating Data Behavior: Choose whether to send one email for a parsed email or send one email for each extracted dataset
- Subject: Write the subject line; you can include parsed data using {{tags}}
As for the body of the email, you have a rich-text editor where you can write and format the email body.
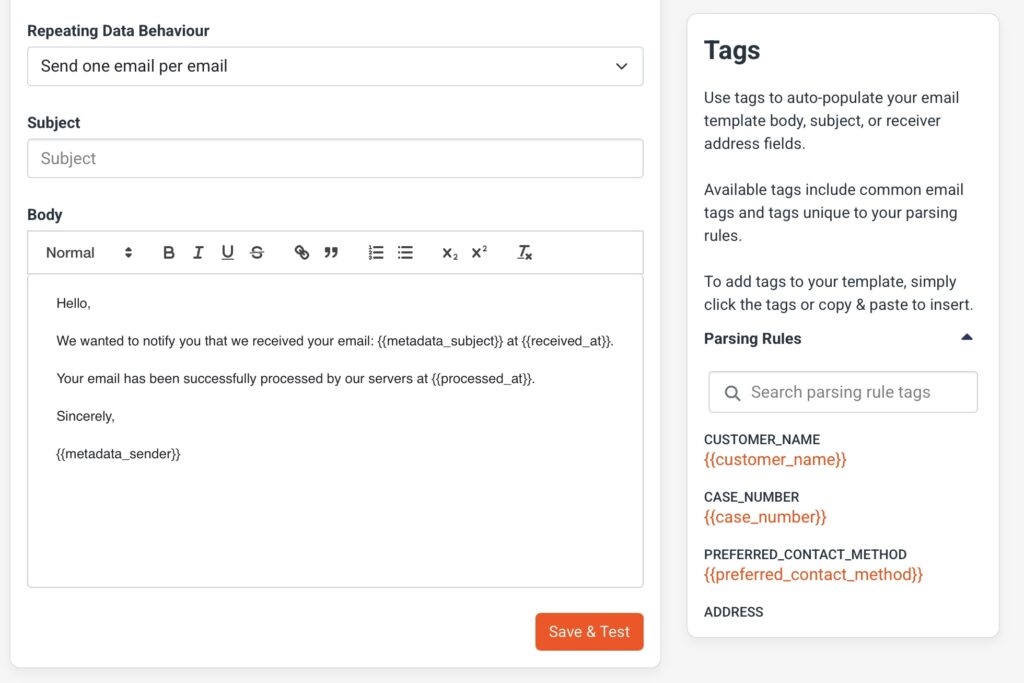
Use tags from the right-side panel to include dynamic content such as metadata and your parsing rules:
- {{first_name}}
- {{phone_number_text}}
- {{customer_email}}
Note that you can add parsed data as plain text, HTML table, or a CSV attachment.
You can preview the outbound email and refine it as needed. Once you’re done setting up your outbound email integration, click on ‘Save & Test’.
4. Test your integration
After saving your outbound email integration, you’ll see a pop-up box asking you to test it. Click on ‘Send Test Data’.
Now, send a sample email to your Mailparser inbox to test. The moment the email gets parsed, the integration kicks in: it populates the email template with the parsed data and instantly sends it to your recipient(s).
So that’s how you can use our outbound email integration to automatically send emails with personalized content and parsed data. No need to pay for extra tools or deal with SMTP hassles!
3 Use Cases of Automated Outbound Emails
Automated customer follow-ups
Many businesses struggle to consistently follow up with customers after an initial interaction e.g. a support resolution, a sales inquiry, or a completed purchase — due to high workload or lack of time. This leads to missed opportunities to build stronger relationships, upsell, gather feedback, or ensure satisfaction.
But thanks to Mailparser, you can parse customer data from incoming emails and send automated follow-up emails. For example, after resolving a support ticket, the customer receives an automated outbound email thanking them for reaching out and asking if their issue is fully resolved or if they need further assistance.
Similarly, for sales inquiries, a follow-up email can be sent a few days after the initial contact to check if the customer has questions or is ready to proceed.
By automating customer follow-ups, you will:
- Ensure every customer receives timely follow-ups without manual effort
- Increase customer satisfaction and loyalty by showing proactive care
- Improve conversion rates by re-engaging potential customers who need more time or information
- Provide opportunities to upsell or cross-sell relevant products or services
- Collect valuable customer feedback for service and product improvement
- Free up team time while maintaining consistent and professional communication
Support ticket generation
Support teams often receive customer inquiries directly in a shared inbox. Manually checking each email and entering its details into a help desk system wastes valuable time and can lead to delayed responses, misrouted tickets, or overlooked issues.

With outbound email automation, key details are extracted from incoming emails: customer name, email address, issue description, priority, etc. Then, Mailparser automatically sends an outbound email to the appropriate support agent. This results in:
- Faster ticket creation with no manual entry
- Improved response times and SLA adherence
- Better routing to the right team or agent
- Reduced human error and missed customer inquiries
- Higher customer satisfaction thanks to quicker response and resolution
Internal alerts for specific triggers
Businesses often receive important updates by email, such as shipment delays, payment failures, or low inventory alerts. Manually monitoring these emails is inefficient and can result in late responses, operational issues, or dissatisfied customers.

With outbound email automation, essential data is extracted from emails and then sent in new emails to the relevant internal team (e.g. logistics, finance, procurement). The results are clear:
- Immediate internal notifications for important updates
- Faster decision-making and problem resolution
- Reduced operational bottlenecks
- Improved cross-team communication
- Enhanced reliability and trust with customers and partners
Give Outbound Emails a Try
This powerful new feature will help our users simplify email workflow automation. Sending outbound emails to your inbox, team, or clients helps you complete tasks faster and at a lower cost. Your entire workflow takes place inside Mailparser, allowing for better visibility and fewer points of failure.
So log in to your account and set up your email integration in minutes. If you need help, don’t hesitate to contact our Customer Happiness team! We’re always happy to help.